Sauna Lite WordPress Theme Documentation
Introduction
I'm grateful for installing our WordPress Theme. The complete procedure to configure and manage a WordPress Website from the beginning is shown in this documentation in different portions.
What is WordPress CMS?
WordPress is an open source tool which is based on PHP and MySQL to create websites. It is a completely free CMS, or content management system and a strong blogging platform. With this CMS, you can develop websites and solid online apps. You hardly require any knowledge or technical capability to manage it. WordPress has become the most accepted website development software available because of its varied aspects like it’s easy usage and flexibility.Learn More
What is a WordPress template
A WordPress template acts as a skin for the websites which are created on WordPress CMS. The installation of a WordPress Template is very easy. With the help of an installed new template, you can change the look of your WordPress website very easily. All the requisite source files are provided with a WordPress template and you can freely go for editing and increasing it the way you want.
Files structure
The template package you have downloaded consists of several folders. Let's see what is contained in each folder:
-
Screenshots : contains template screenshots. Not for production.
-
Theme : contains files for WordPress themes.
-
sauna-lite_1.2.0.zip: this folder contains all the necessary files for the subject.
-
license.txt : contains license details.
-
readme.txt : contain information about theme images path and font use and usage scritps.
Template Installation
Template installation is very easy process.
Step 1. Theme Installation
First thing you need to do is sign in wordpress. Next, click on
All installation steps can be done within WordPress interface. It makes process comfortable and fast.
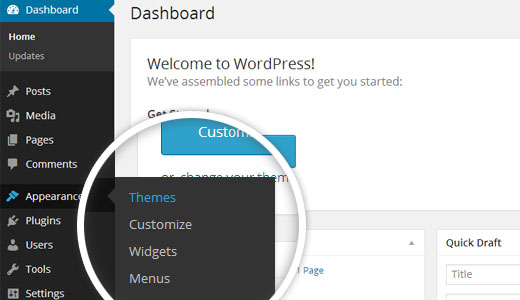
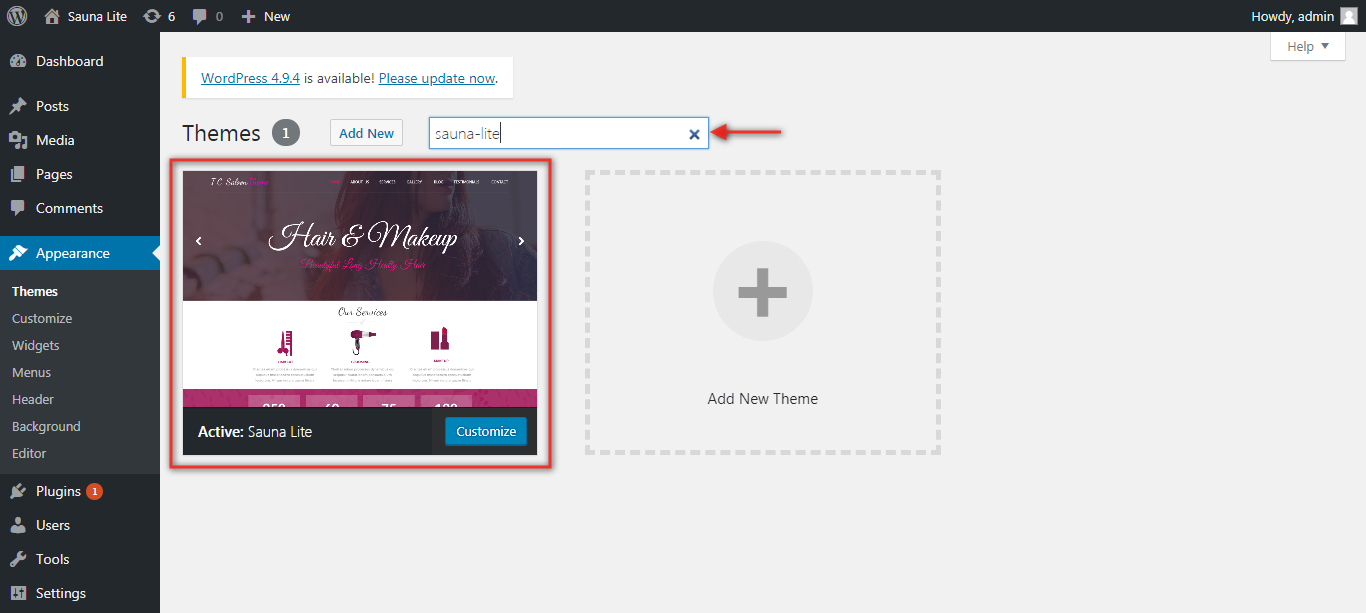
Visit the menu Appearance Themes.
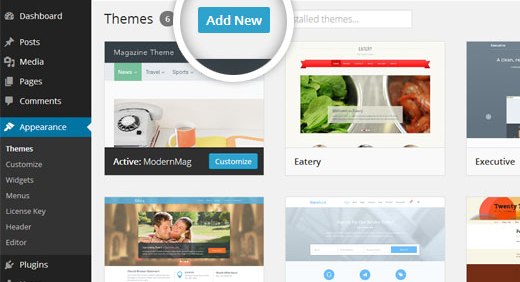
Once you are on the Themes activation page, click on the Insert New link.
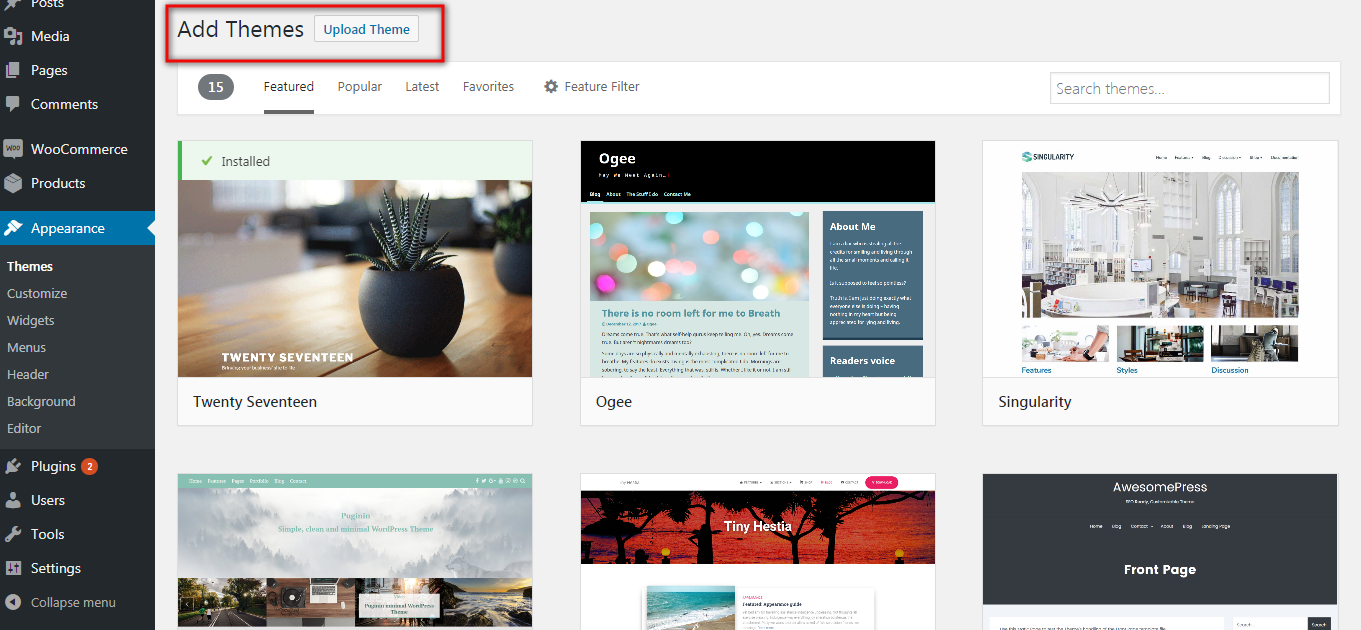
To upload a theme,click the link..
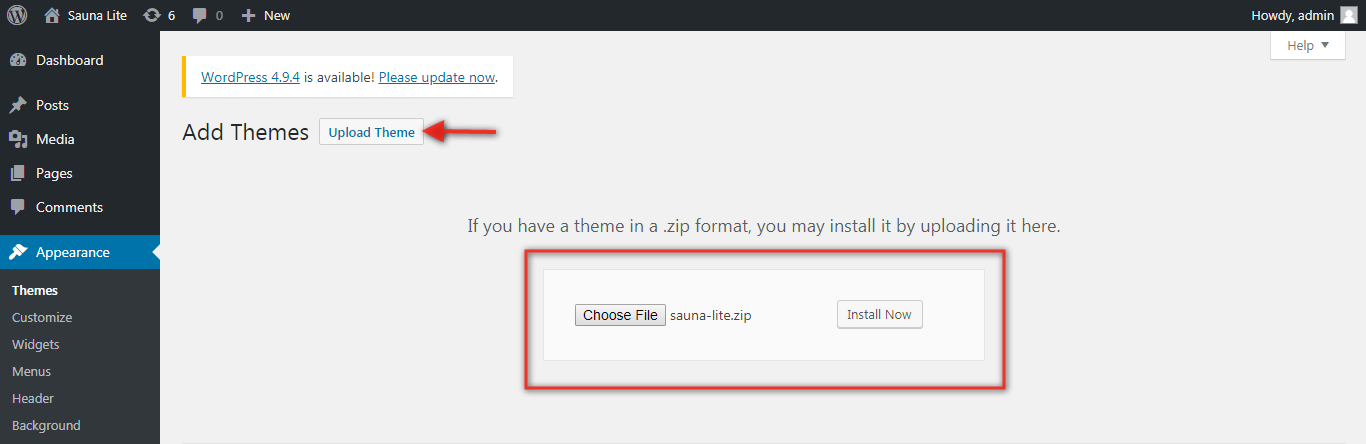
Toggle Browse link then select your suana-lite.zip theme and To install now,click the button..
WordPress will now install your theme and show you a success message along with the activated connection or live preview.
Congratulations, your theme have been successfully installed!
Step 2. Install a Theme using FTP
Your an alternative installation choice is to FTP-upload the theme. For this method first log into your site using FTP and browse to your themes folder located at wp-content. extract the theme file downloading and upload only the extracted Total folder to your server.

Next log into your WordPress site and navigate to the Appearance Themes to activate.
Theme Demo Import
For Importing Demo proceed as follows.
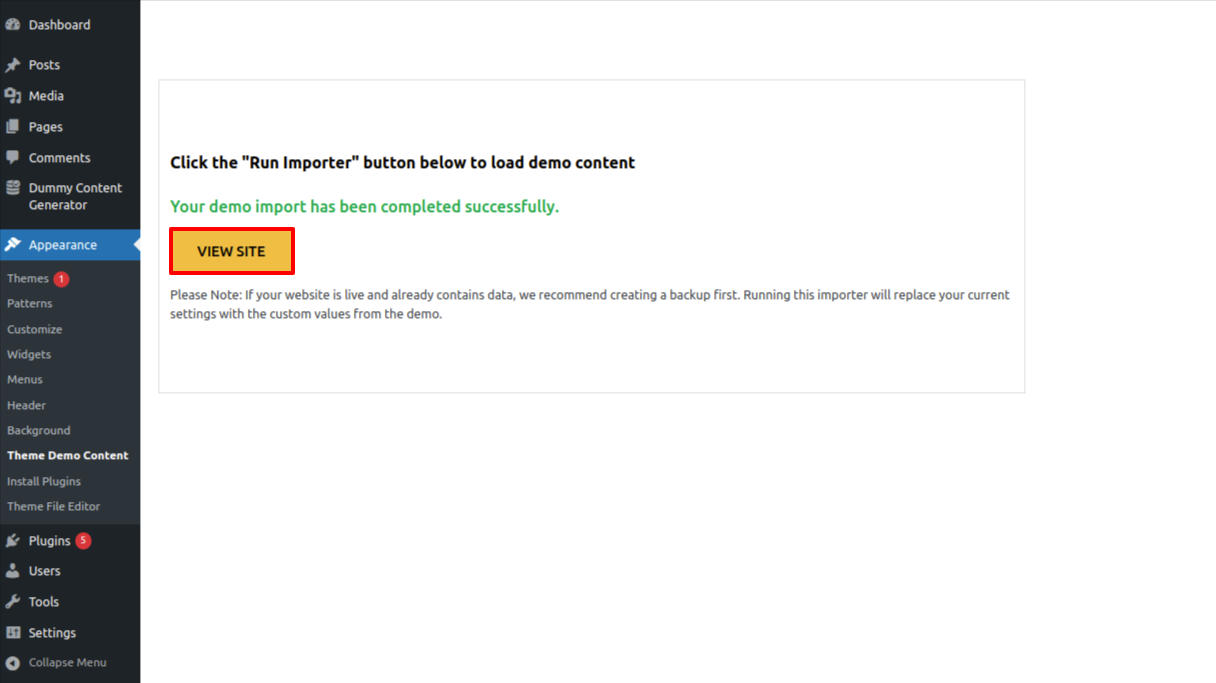
Visit Dashboard Appearance Theme Demo Content.
1.Click Run Importer Button as shown in figure below.
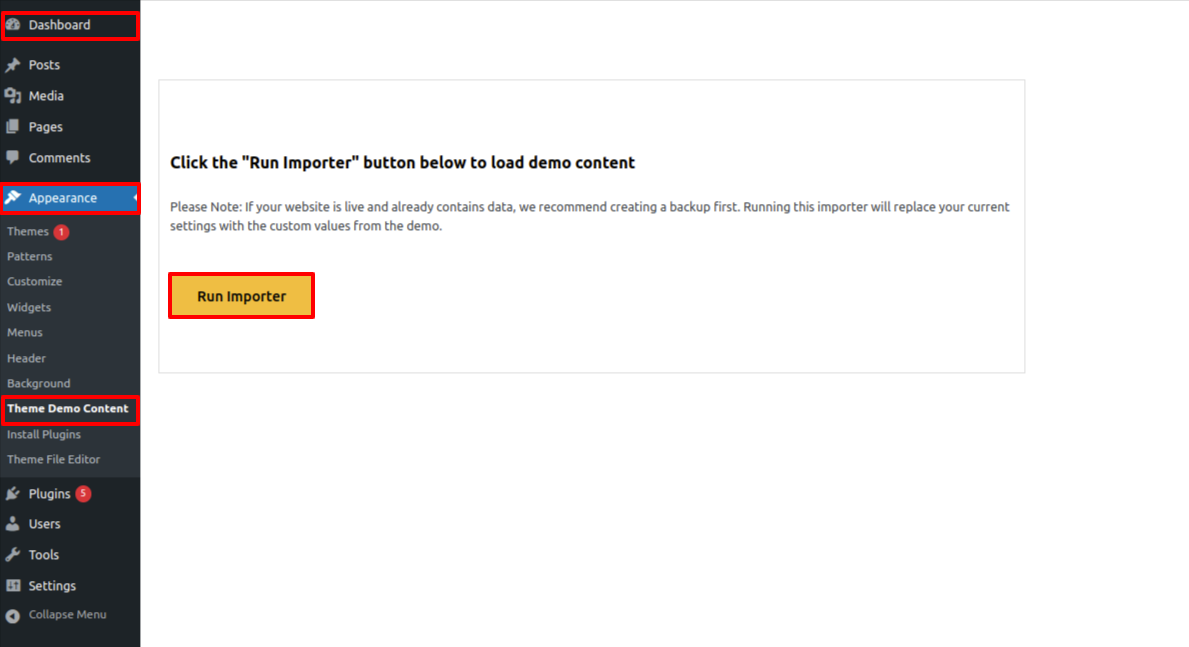
2.Then Click on Visit Site Button.
Theme Setup
Once you view your site after activating the theme, You will see the index page with the latest post. Now you will need to setup the front page template to show all the demo section on your front page.
Setup front page Template
Follow these instructions to setup front page.
1. To establish a template, Establish a Page : Visit Dashboard Pages Add New Page.

2. Set front page: Visit Setting Reading Set front page prsentation front page from static..
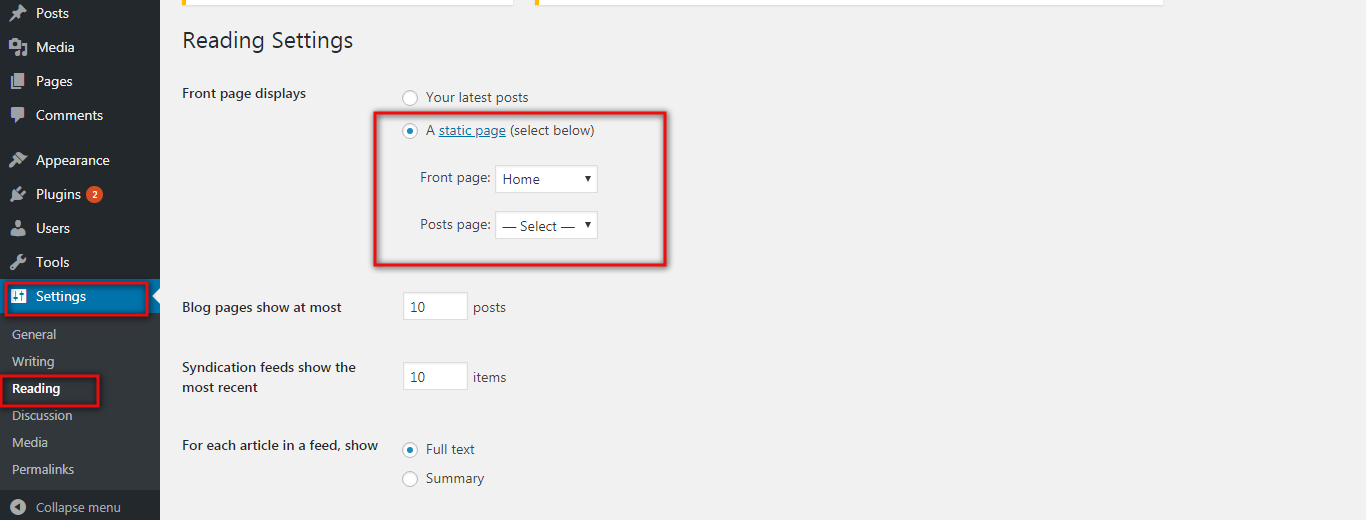
When you're finished, you can view the whole demo on the top page .
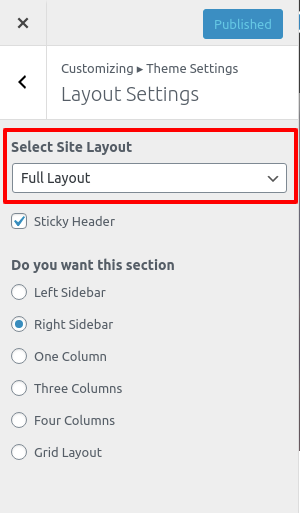
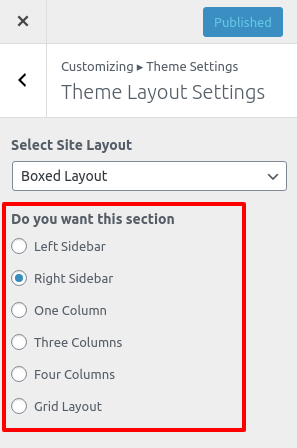
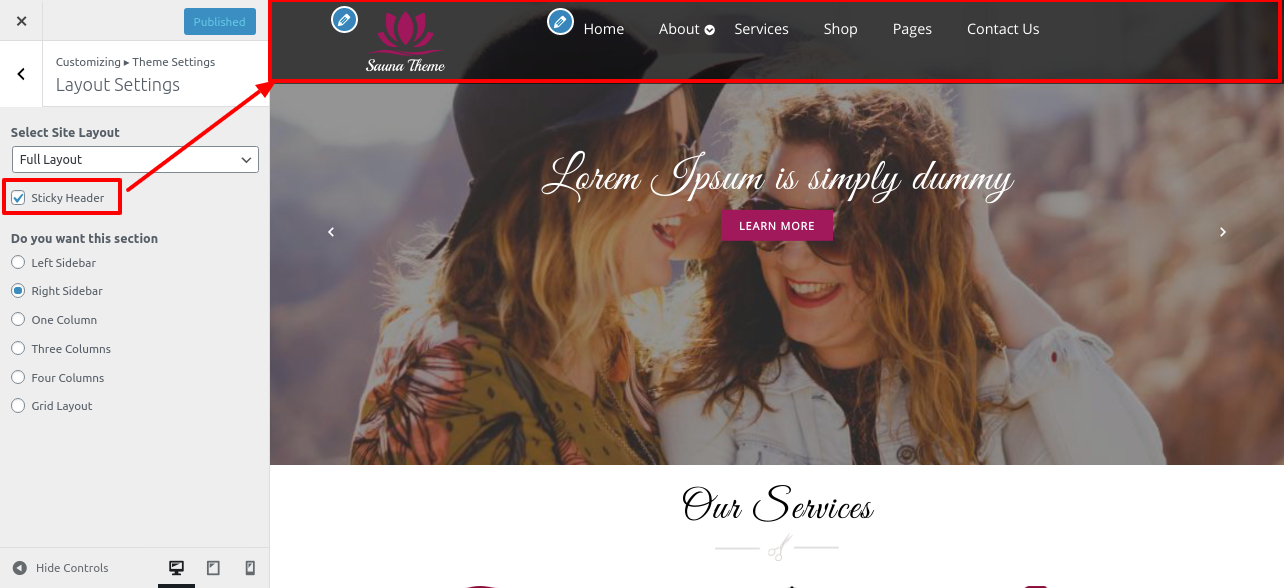
Setup Layout Settings
Being able to proceed with Theme Layout Setup.
1. Site Layout:
Visit Appearance click on Customize click on Theme setting click on Layout setting
Select the site layout which you want, it has three site layouts
1. Full Layout: In this, theme will appear as deafault.
2. Contained Layout: In this, theme will appear as it is in the container-fluid.
3. Boxed Layout: In this, theme will appear as it is in the box container.
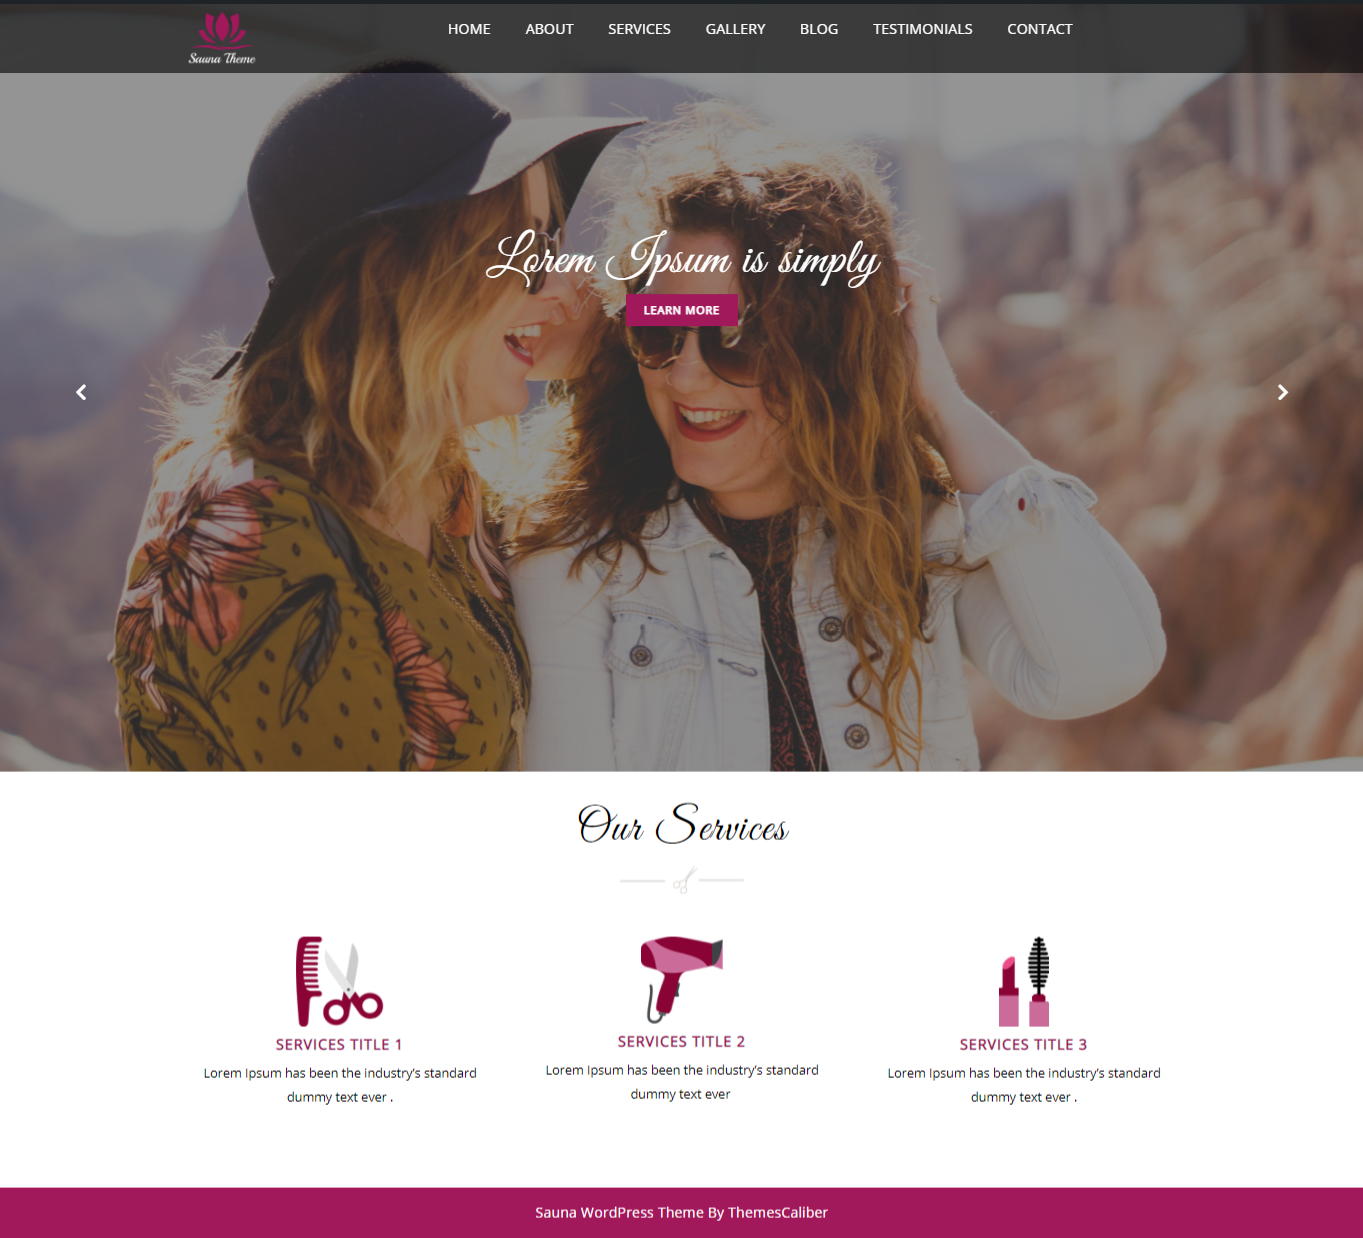
Suppose, Full layout selected then it will seems like below screenshot.
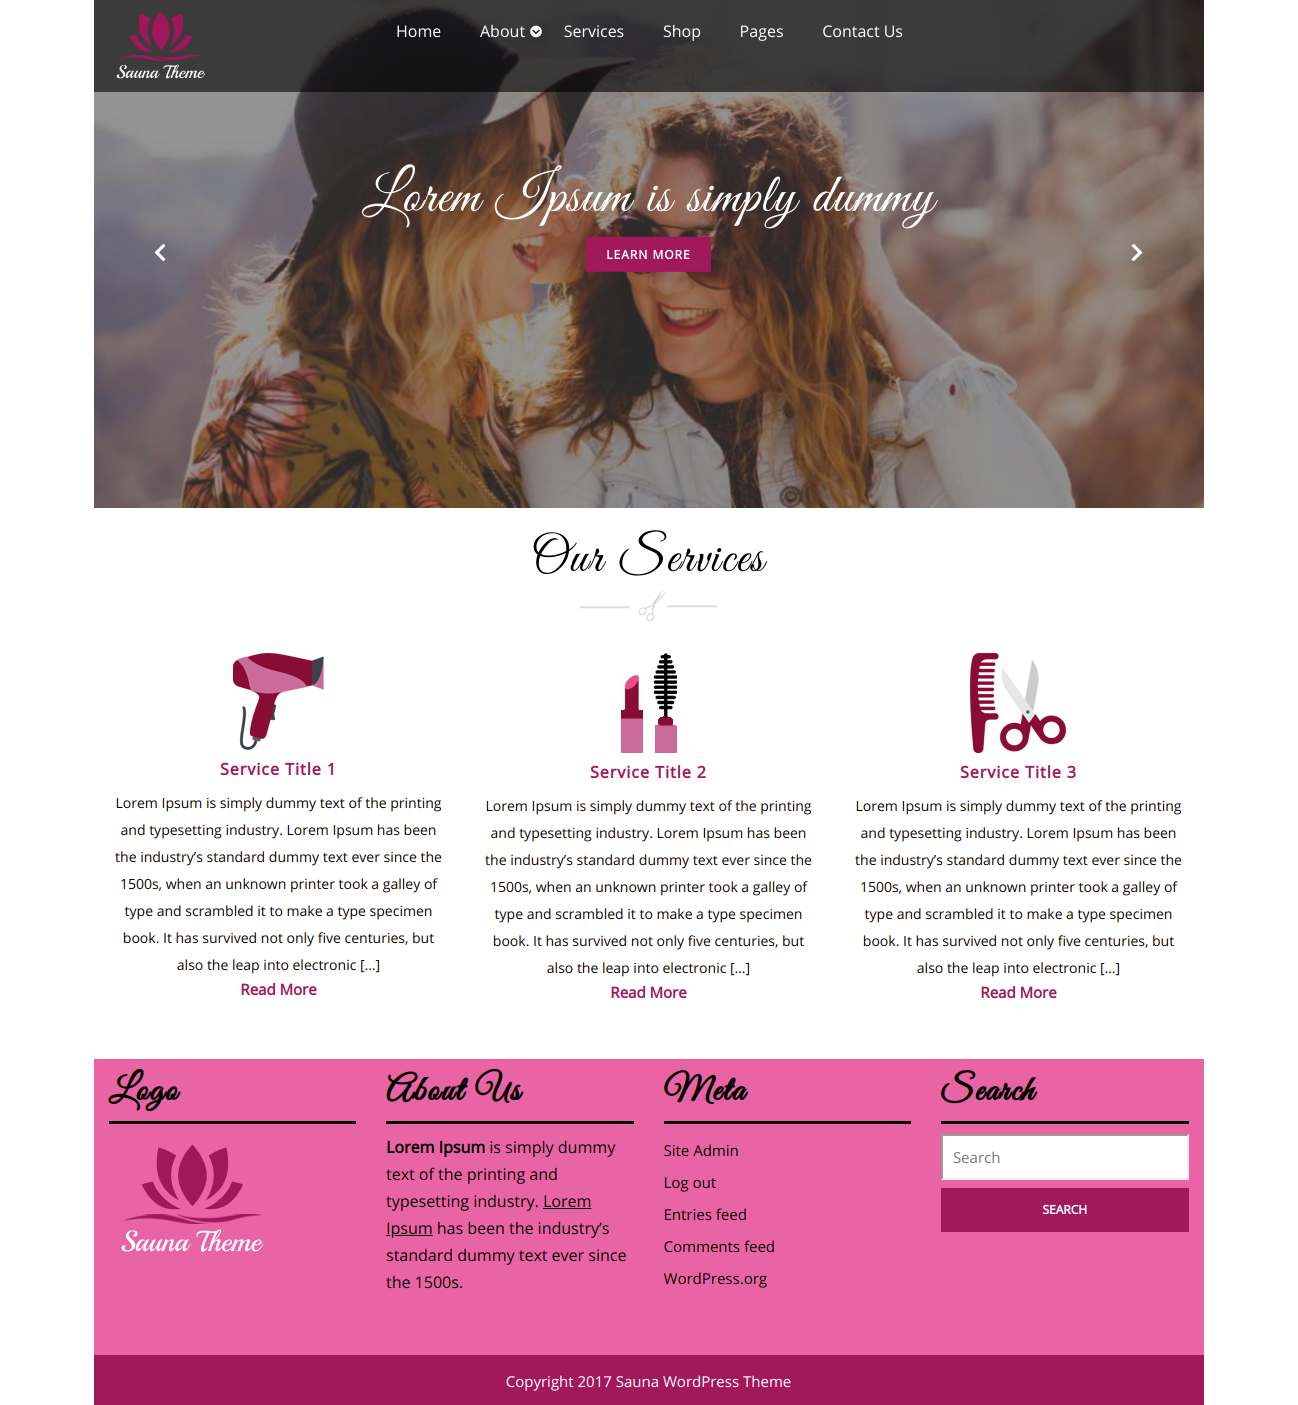
Suppose, Boxed layout selected then it will seems like below screenshot.
2. Sidebar Layout:
Visit Appearance click on Customize click on Theme setting click on Layout setting
You can select the sidebar layout from here.
Setup Color/Font Pallete
Being able to proceed with Color/Font Pallete.
Visit Appearance click on Customize click on Theme setting click on Color/Font Pallete
1. Theme Color: Now you can change the global theme color.
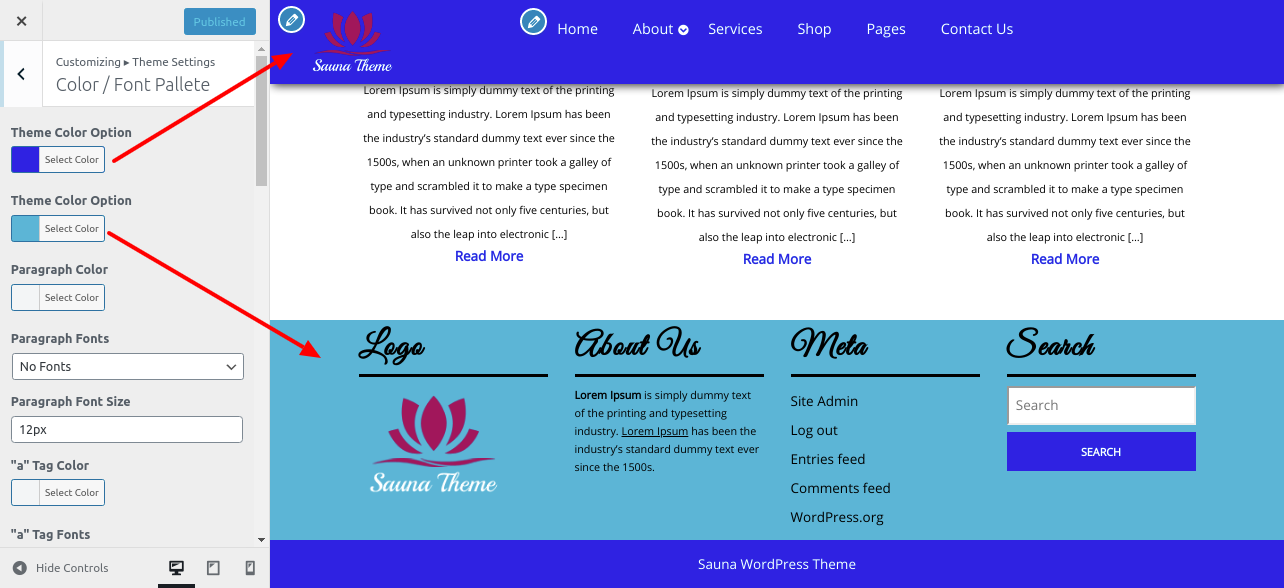
After color change theme will look like below screenshot.
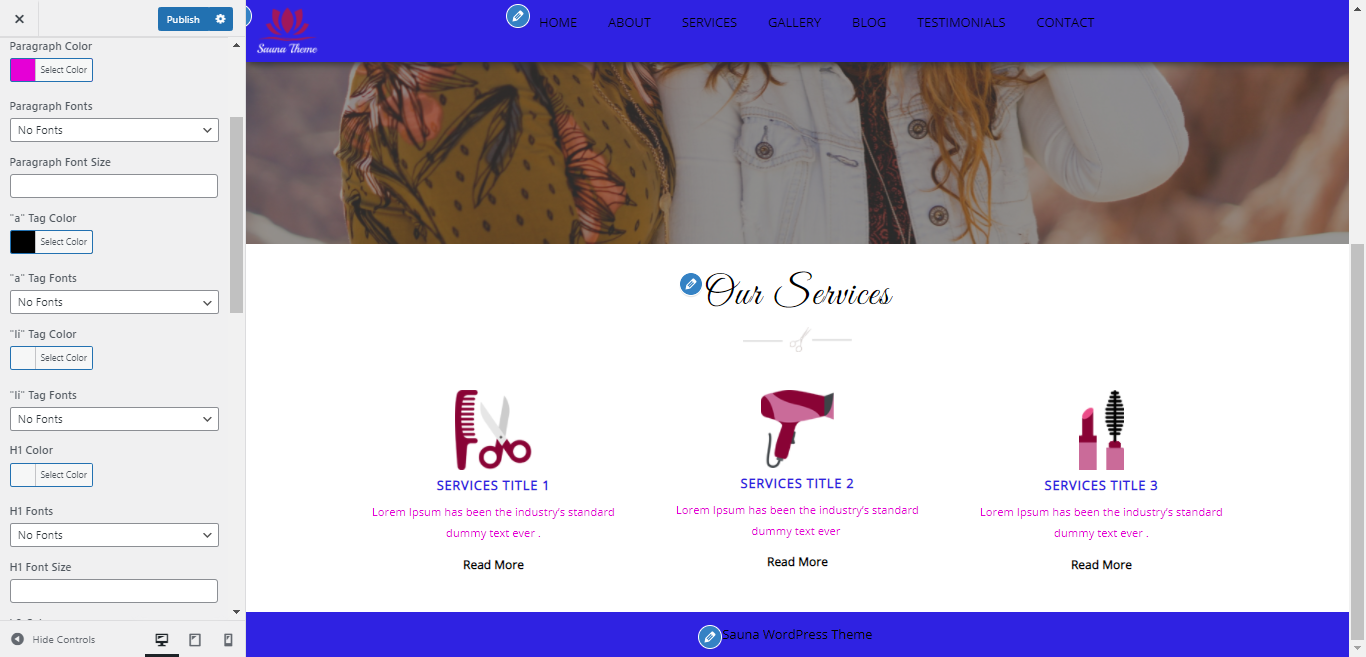
2. Color: Now you can change the colors of all Paragraph, 'a' tag, 'li' tag, H1, H2, H3, H4, H5 and H6 respectively.
2. Fonts: Now you can change the Font Family of all Paragraph, 'a' tag, 'li' tag, H1, H2, H3, H4, H5 and H6 respectively.
3. Font Size: Now you can change the Font size of all Paragraph, 'a' tag, 'li' tag, H1, H2, H3, H4, H5 and H6 respectively.
Their customizer settings are like below screenshot.
Setup Header
1. Site Identity :
Being able to proceed with Site Identity,
Visit Appearance click on Customize click on Site Identity
Now You might incorporate logo and also you can change the logo width.
2. Sticky Header :
Now you have an option to stick the header on top.
Visit Appearance click on Customize click on Theme setting click on Layout setting
Being able to proceed with Top Header Section,
Visit Appearance click on Customize click on Theme Settings click on Header Section
1. Sticky Header : Now you have an option to stick the header on top.
2. Sticky Header Padding : Now you have an option to give top bottom padding for stick header .
3. Navigation Case: Now you have an option to add navigation case like uppercase and capitalize.
4. Navigation Font Size: Now you have an option to add font size of navigation.
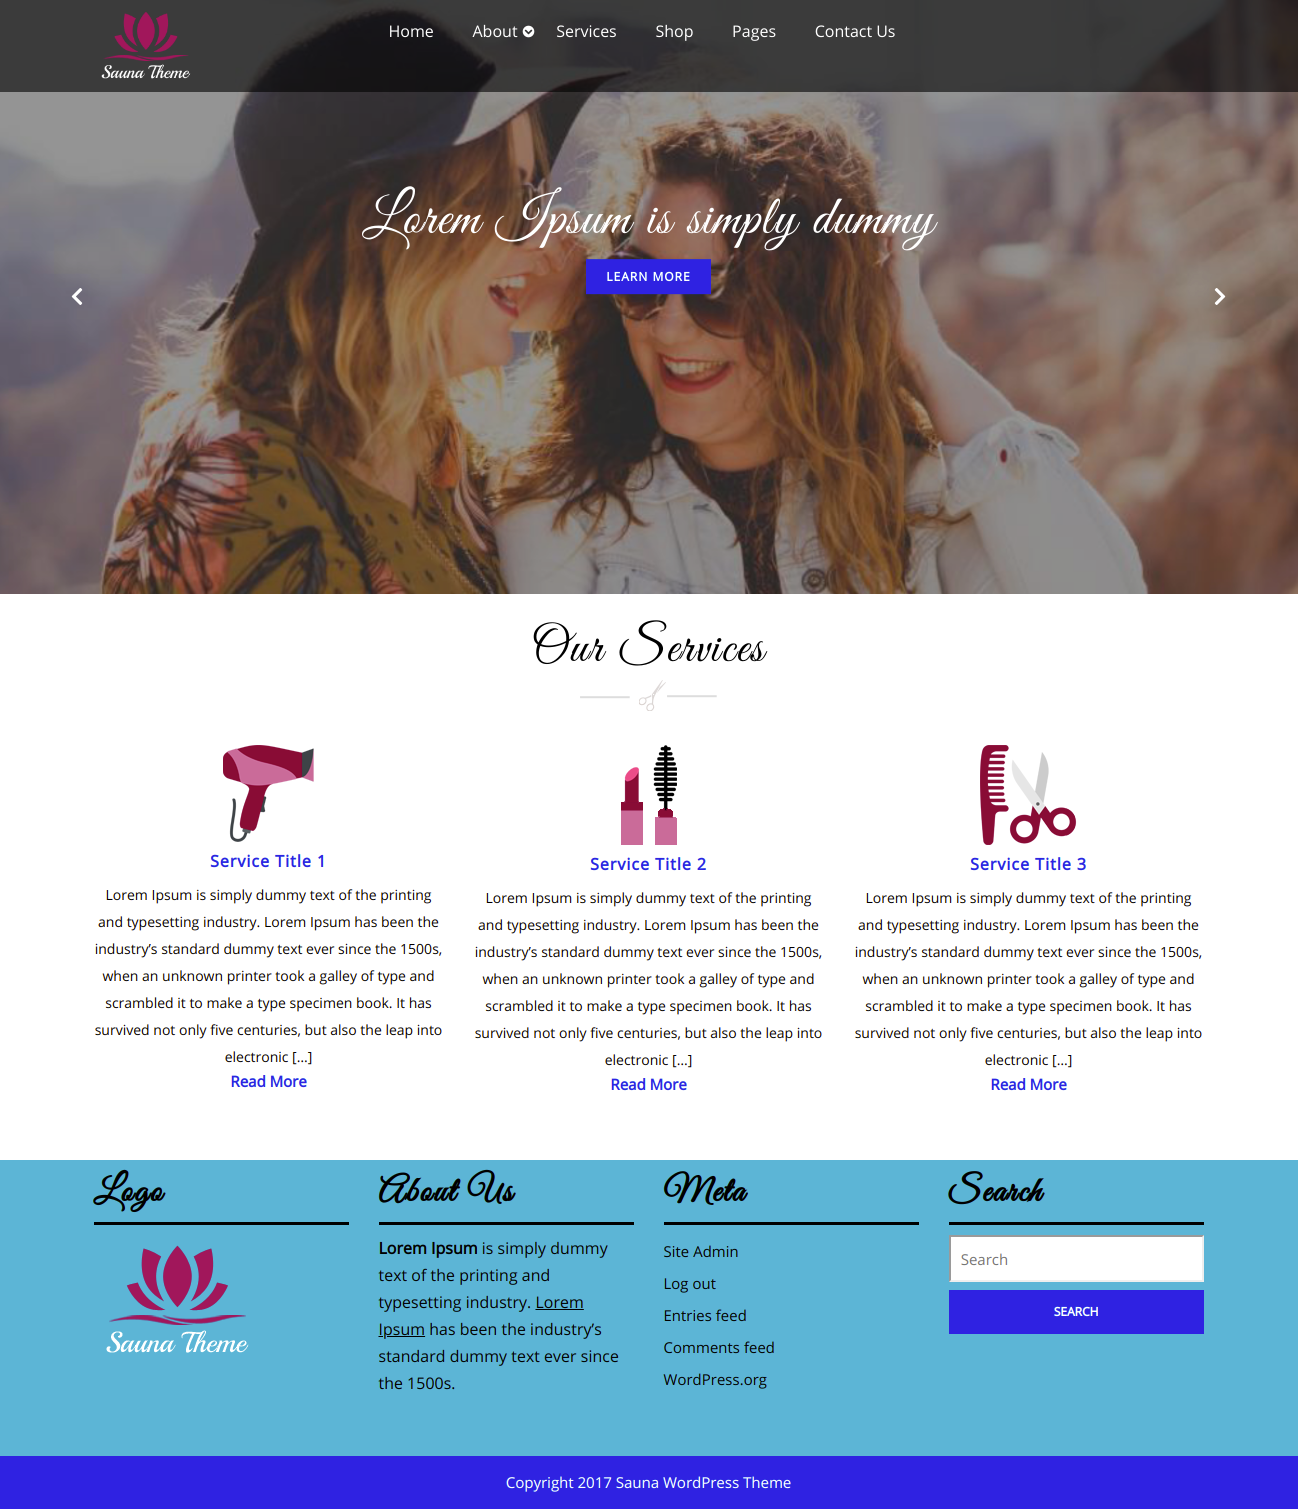
Setup Slider
Being able to proceed with Slider Setup.
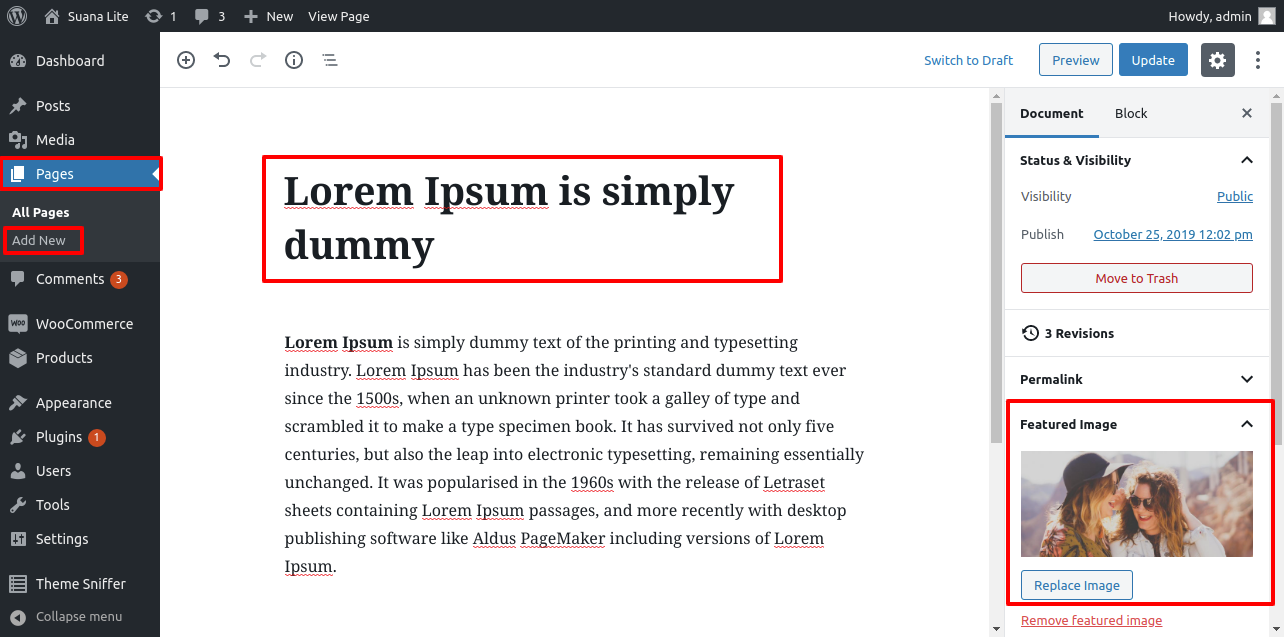
Visit Appearance click on Pages click on Add New
Repeat the above step for other slider.
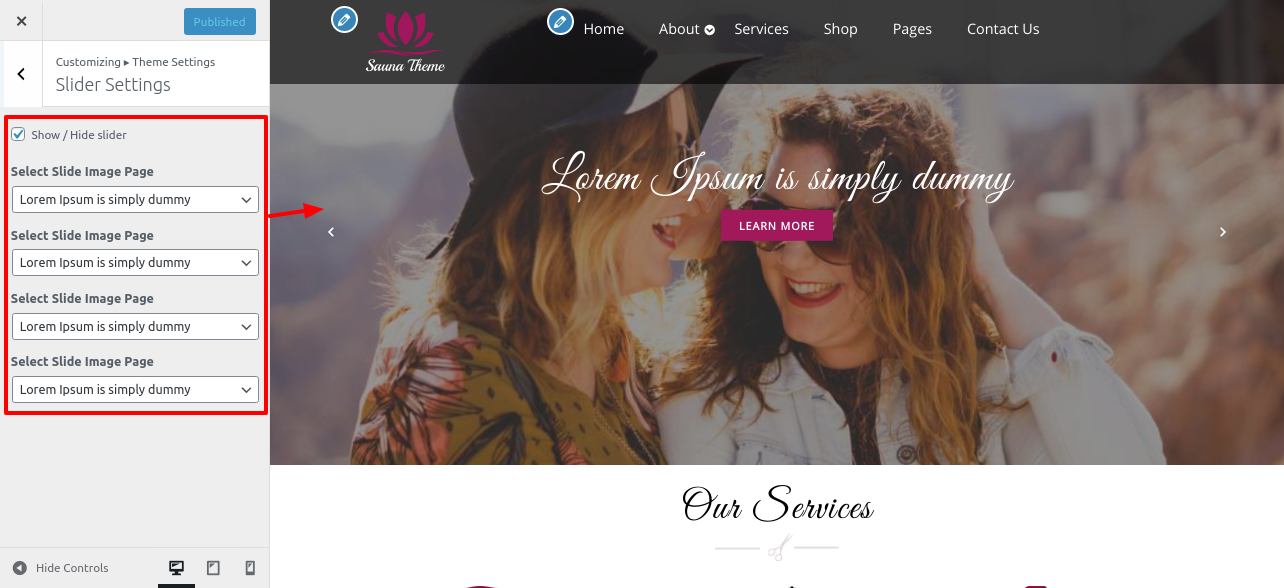
Visit Appearance click on Customize click on Theme setting click on Slider setting
Select slider image page click twice the checkbox of show/Hide Slider and publish
Being able to proceed with Slider Section,
Visit Appearance click on Customize click on Theme Settings click on Slider Setting
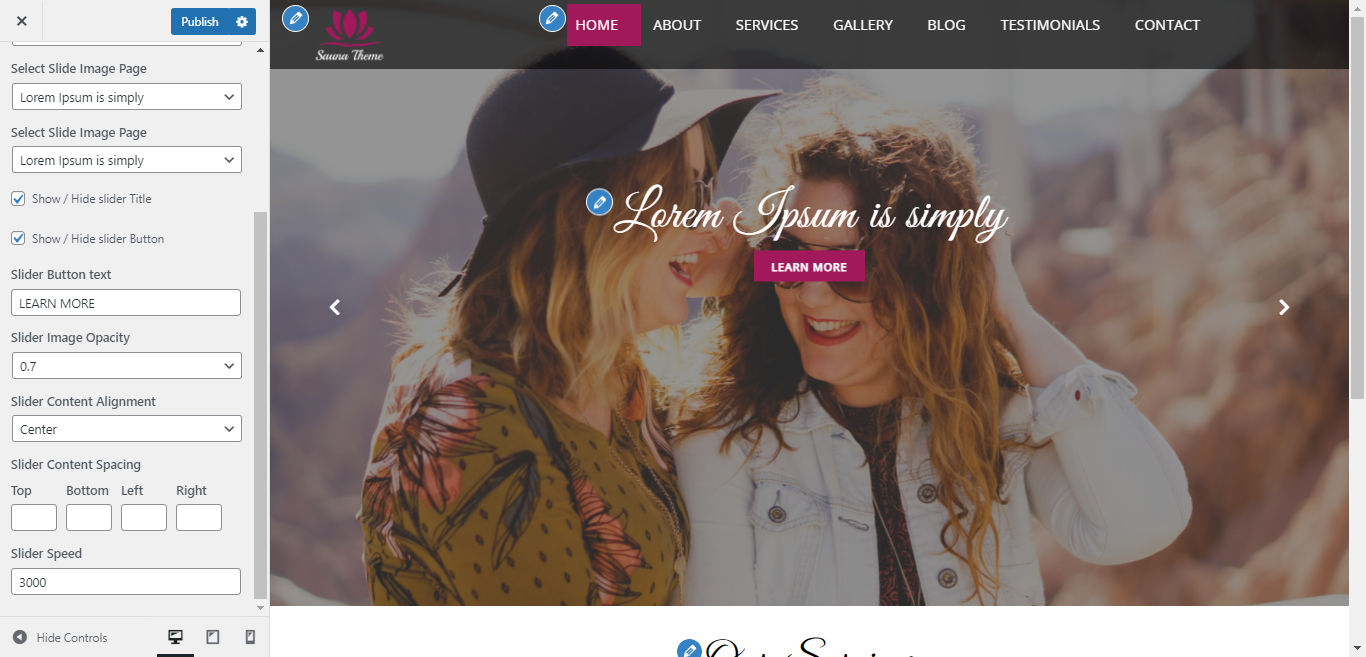
1. Show / Hide slider: Now you have an option to Show / Hide slider
2. Select Slide Image Page: Now you have an option to add path of slider image.
3. Show / Hide Slider Title: Now you have an option to Show / Hide Title of slider.
4. Show / Hide Slider Button: Now you have an option to Show / Hide Button on the slider.
5. Slider Button Text: Now you have an option to add button text for slider, READ MORE.
6. Slider Image Opacity: Now you have an option to change transparency of slider image.
7. Slider Content Alignment: Now you have an option to add position of slider content, Left Alignment, Center Alignment, Right Alignment.
8. Slider Content Spacing: Now you have an option to add spacing beteween the slider content , top-bottom and left-right.
9. Slider Speed: Now you have an option for give the speed of slider to load slider fast..
Setup Footer
Being able to proceed with Footer,
Visit Appearance >> Customize >> Widgets
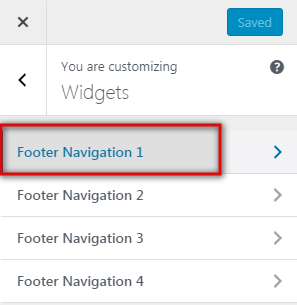
Visit Appearance >> Customize >> Widgets >> select Footer Navigation 1 >> select Add a Widgets
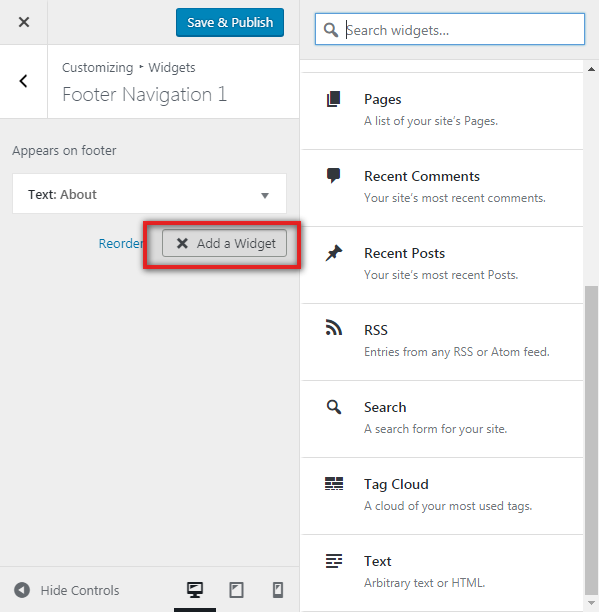
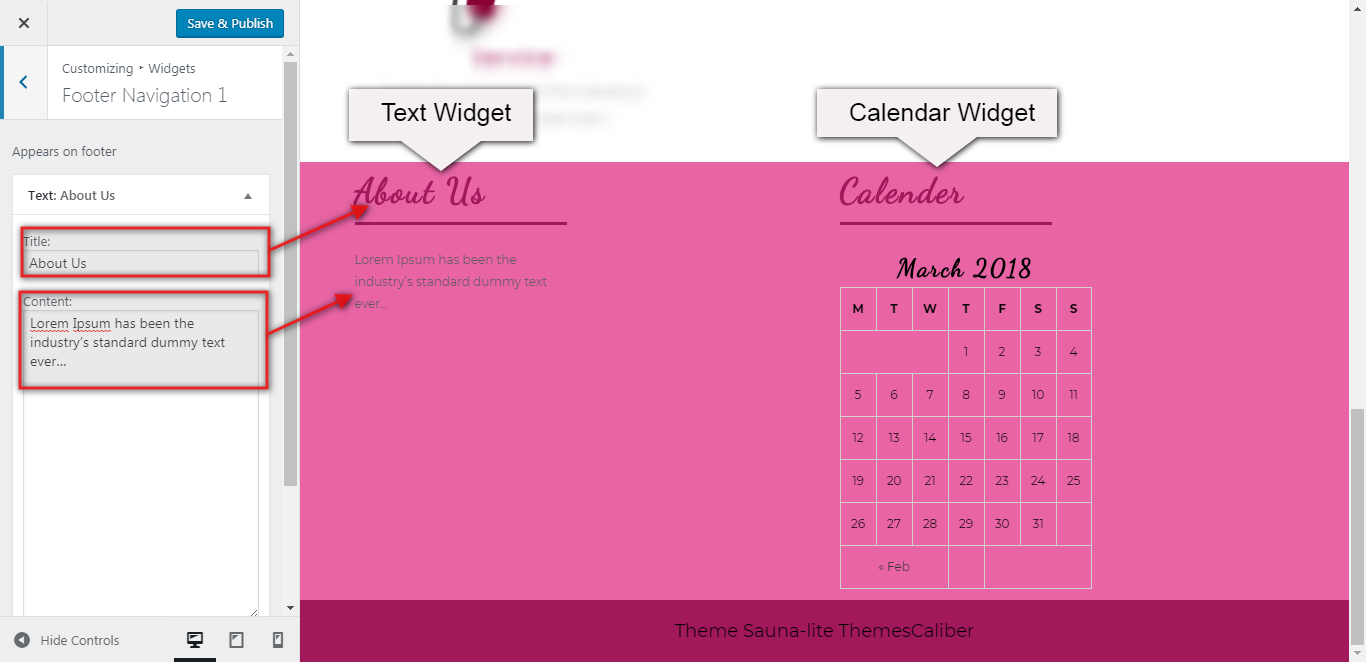
You might incorporate widgets which you want to show on footer here
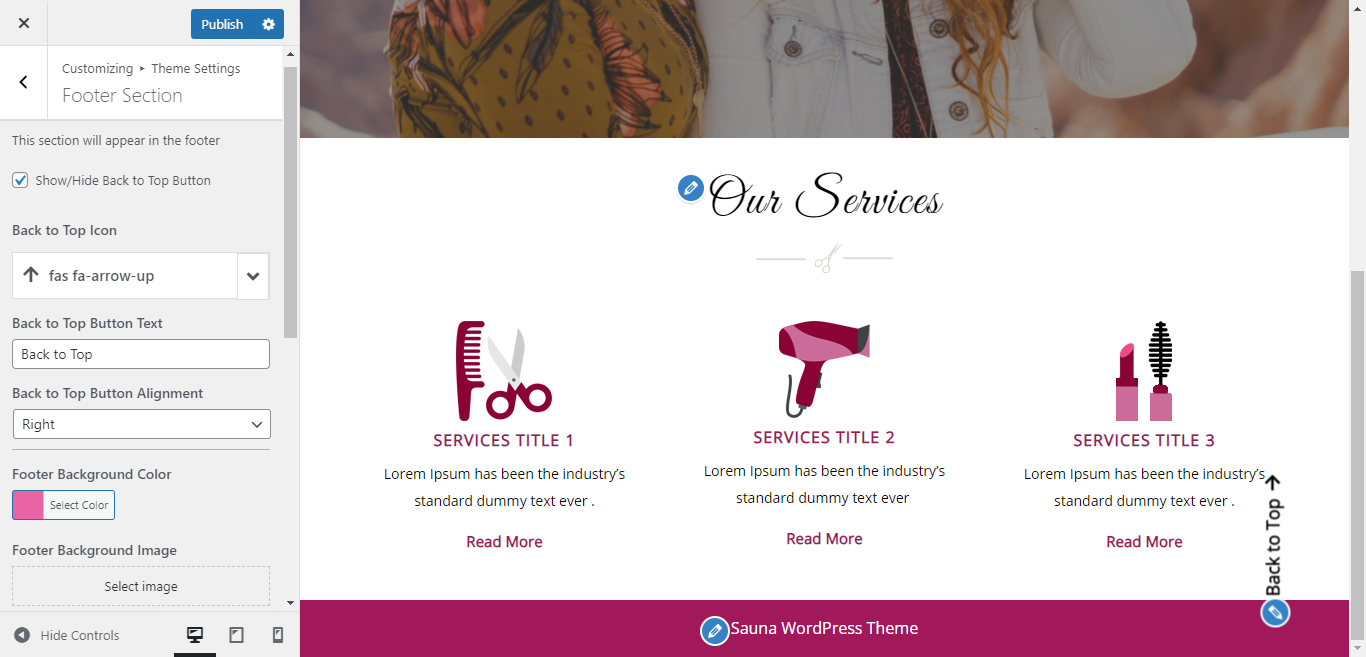
Visit Appearance click on Customize click on Theme Settings click on Footer Section.
Being able to proceed with Footer Section,
1. Show/Hide Back to Top Button: Now you have an option to Show/Hide Back to Top Button.
2. Back to Top Icon: Now you have an option for Back to Top Icon.
3. Back to Top Button Text: Now you have an option to Back to Top Button Text.
4. Back to Top Button Alignment: Now you have an option to Alignment of Back to Top Button like Right , Center , Left.
5. Footer Background Color: Now you have an option to Selecting Background color for footer.
6. Footer Background Image: Now you have an option to Selecting Background image for footer
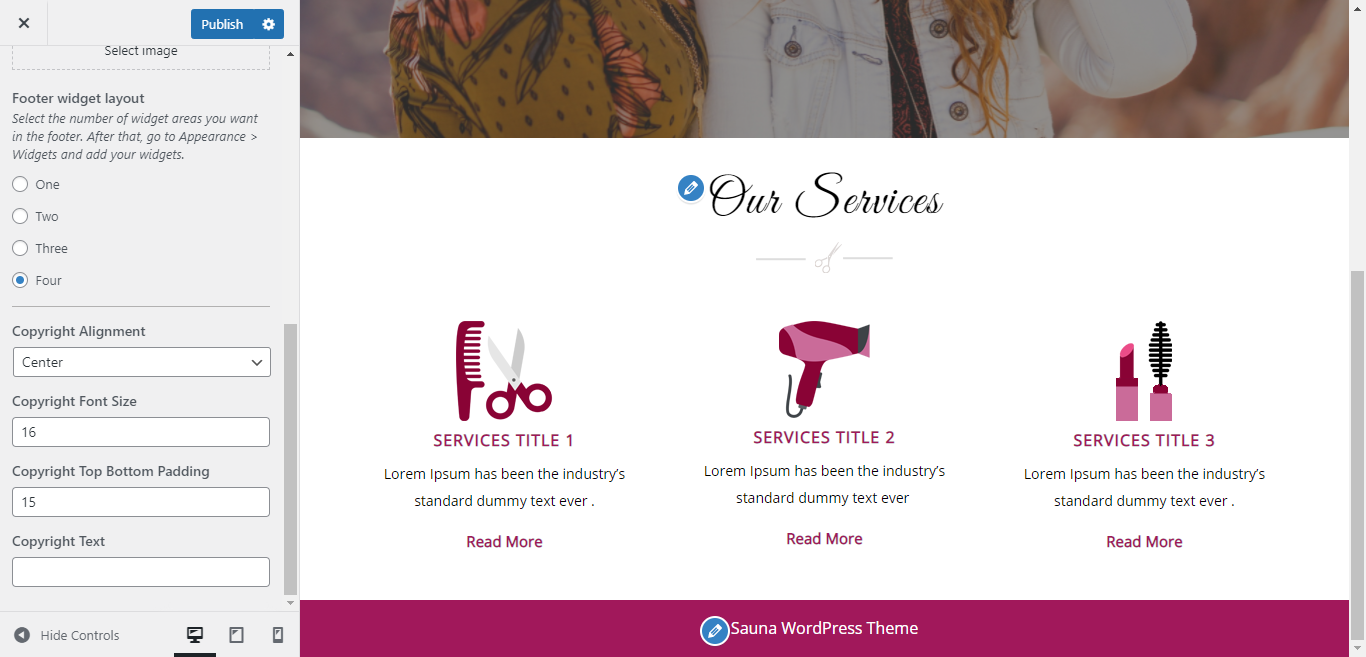
Setup Footer Text
Being able to proceed with Footer text,
Visit Appearance >> Customize >> Theme Settings >>Footer Text

Footer Text : You might incorporate text which you want to show on footer here
Being able to proceed with copyright Section,
1. Copyright Alignment: Now you have an option for Copyright Aligntment like Center , Left , Right.
2. Copyright Font Size: Now you have an option for Font Size of Copyright.
3. Copyright Top Bottom Padding: Now you have an option to Top Bottom Padding of Content for Copyright.
4. Copyright Text: You might incorporate text which you want to show on footer here.
Setup 404 & No Result Page
Visit Appearance click on Customize click on Theme Settings click on 404 & No Result Page Section.
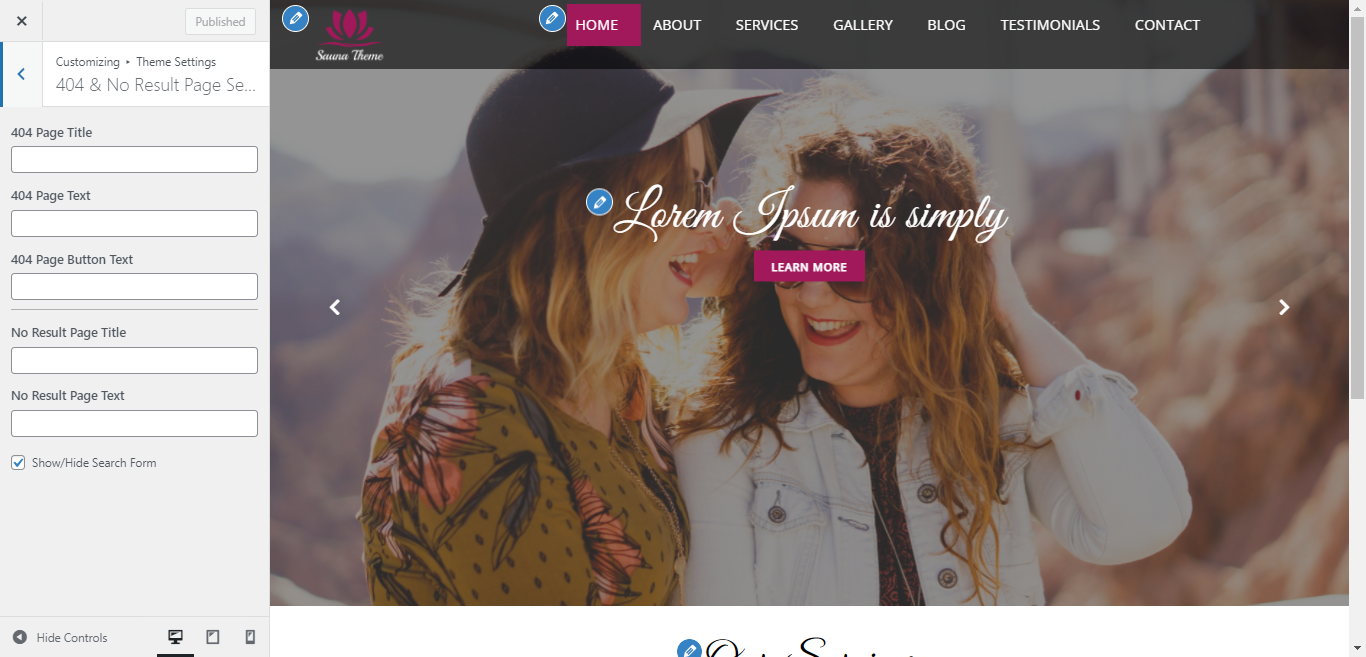
Being able to proceed with 404 Section.
1. 404 Page Title: error 404 page has a page title not found.
2. 404 Page Text: error 404 page has a page Contain not found
3. 404 Page Button Text: error 404 page Text of Button not found
4. No Result Page Title: error site title not found
5. No Result Page Text: error site contain not found
WooCommerce Plugin
First, you need to download woocommerce plugin from the site Wordpress.org . Next, you need to Visit WordPress admin and visit Plugin.
You will see a success message like this after installation is finished.Once installed, you need to click on the Activate Plugin link to start using the plugin.
Setup WooCommerce
Visit Appearance click on Customize click on Theme Settings click on Additional WooCommerces Section.
Being able to proceed with Additional WooCommerces Section.
1. Product per row: Now you have an option to add Number Of Product in one Row.
2. Product per page: Now you have an option to add Number Of Product in one single page.
3. Enable / Disable Shop page sidebar: Now you have an option to Enable / Disable sidebar of shop page.
4. Enable / Disable Product page sidebar: Now you have an option to Enable / Disable sidebar of product page.
5. Enable / Disable Related product: Now you have an option to Enable / Disable Feature Related product.
6. Button Top Bottom Padding: Now you have an option to add top bottom padding of Product button.
7. Button Border Radius: Now you have an option to add border radius of Product button.

8. Enable / Disable product border: Now you have an option to Enable / Disable product Outer border.
9. Enable / Disable product border: Now you have an option to Enable / Disable product Outer border.
10. Product Top Bottom Padding: Now you have an option to top bottom padding for product.
11. Product Right Left Padding: Now you have an option to right left padding for product.
12. Product Border Radius: Now you have an option to add border to product.
13. Product Box Shadow: Now you have an option to add Box Shadow for product.
14. Sale badge Position: Now you have an option to add postion of sale badge like right portions or left position.
15. Sale Top Bottom Padding : Now you have an option to add top bottom padding for sale badge.
16. Sale Border Radius: Now you have an option to add border radius for sale.

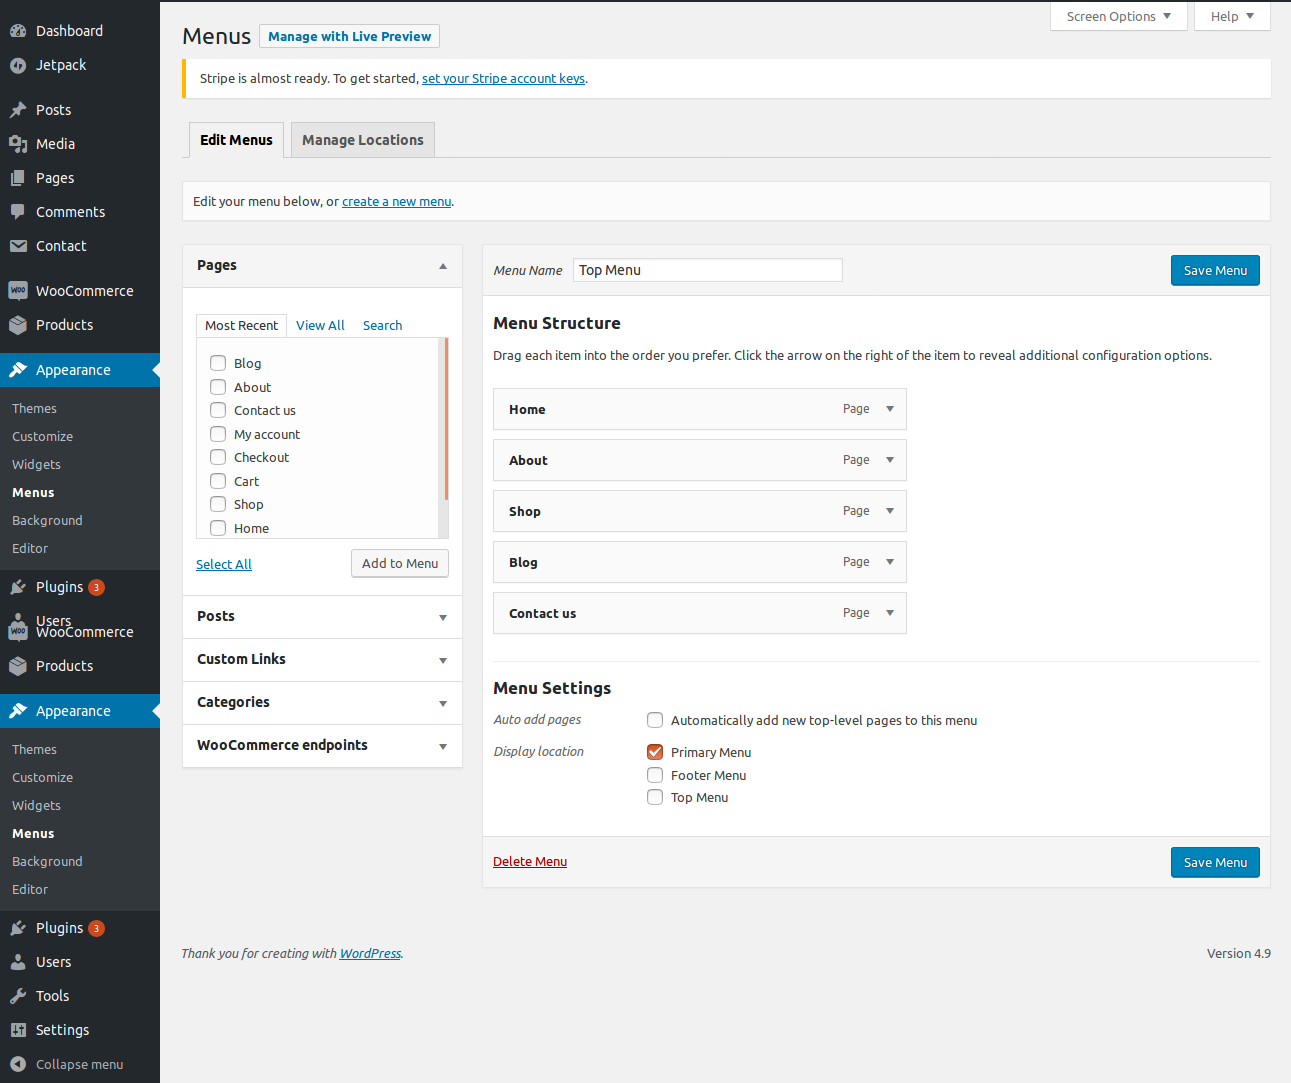
Setup Menus
See this screenshot for better understanding.
Page Templates and Sidebars
Page Templates
Posts, Categories and Post Formats
Adding category
Review the following article for more information on adding categories: http://codex.wordpress.org/Manage_Categories_SubPanel
Click the Publish button.
Visit Appearance click on Customize click on Theme Settings click on Post Setting
Being able to proceed with Post Section,
1. Enable / Disable Post Date: Now you have an option to Enable / Disable Post Date.
2. Enable / Disable Post Author: Now you have an option to Enable / Disable Post Author.
3. Enable / Disable Post Comments: Now you have an option to Enable / Disable Post Comments.
4. Enable / Disable Featured Image: Now you have options to Enable / Disable Featured Image.
5. Featured image border radius: Now you have options to add border radius for featured image
6. Featured image box shadow: Now you have an option to add box shadow for featured image.
7. Post Content Type: Now you have an option to post content type like showing content full or Excerpt Content.
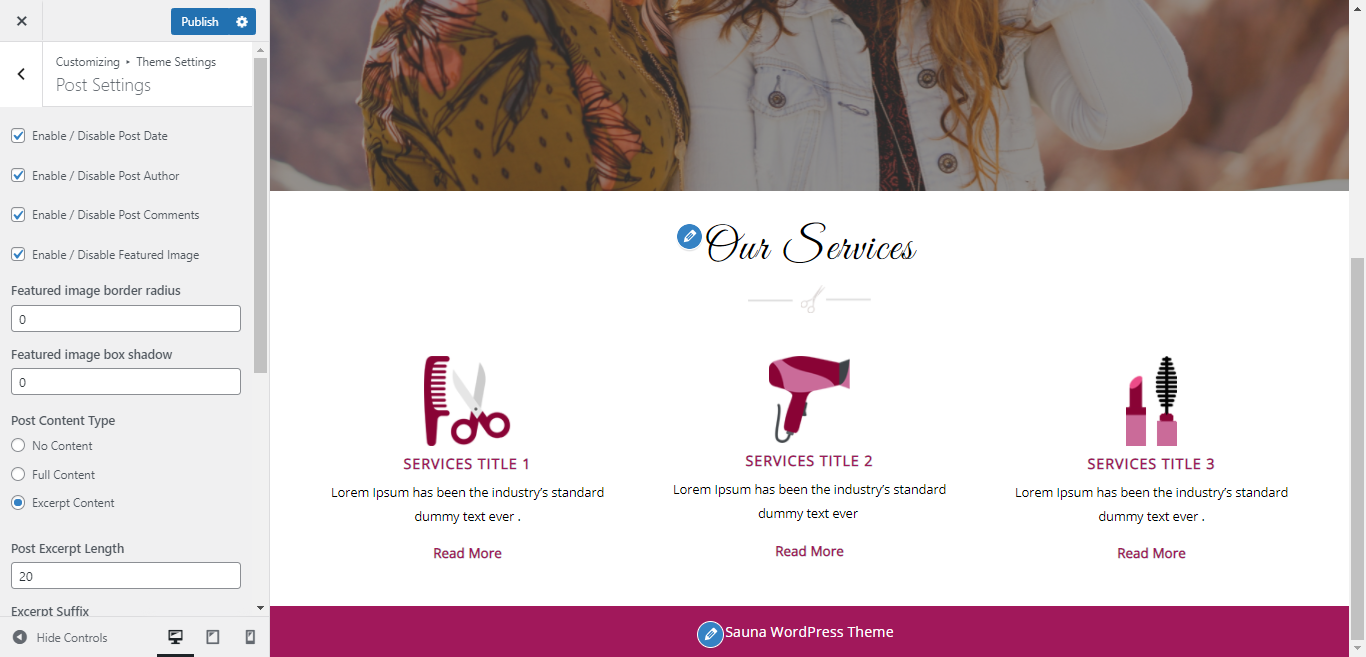
8. Post Button Text: Now you have an option to add text for post button.
9. Top Bottom Button Padding: Now you have an option to add top bottom padding for post button.
10. Left Right Button Padding: Now you have an option to add left right padding for post button.
11. Button Border Radius: Now you have an option to add border radius for post button.
12. Post Navigation Type: Now you have an option to add post button navigation type , Next/Prev Button.

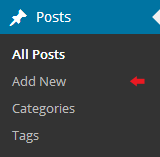
Creating a Blog post
Custom Widgets

Setup Services
Being able to proceed with Services Section, you have to make pages.
Visit Appearance click on Pages click on Add New click on Set Title click on Set Feature Image
Visit Appearance Customize Theme Setting Our Service