Regardless of the type of website, Google Analytics will always be of help. It will provide you with in-depth data about your website and help you improve it. When it comes to understanding your audience, it will be difficult for you to find a good tool for the same.
In this article, you will learn all about how to add Google Analytics to WordPress, and how to make the best use of it. By the end, you’ll be ready to get started with this fantastic analytics tool.
Why Create A Google Analytics Account?

Before we get into the “hows” of Google Analytics, let’s first take a moment to consider the “whys”. If you’re still on the fence, here are some reasons for you to check out Google Analytics.
i) Traffic Data: With Google Analytics, you’ll know exactly how many users visit your site, where they visit, and even when they visit. It will be easy to see which pages are getting more visits and which ones need improvement.
ii) Demographic Data: Your website’s information is not just limited to the number of visitors either. It will give you in-depth information about your audience, such as age, gender, location, interests, etc. By learning more, you can cater to them better.
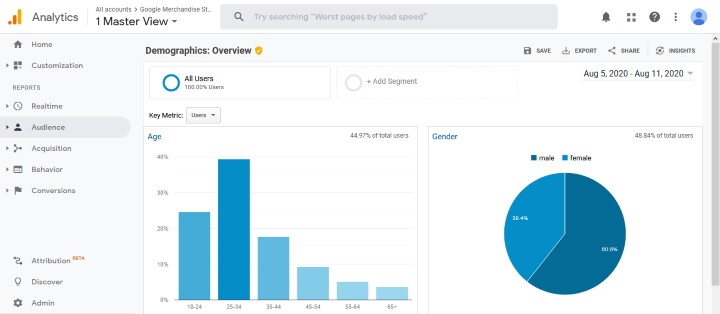
iii) Conversion Data: Using Google Analytics, you can have a much clearer idea and you will come to know exactly the number of people coming to the landing page of your website. You can then make good use of the data regarding incoming traffic, referral links, bounce rates, advertisements, and more.
iv) User-Friendly Presentation of Stats: Despite all the data that it handles, it still manages to keep things easy on the eyes with its simple visualizations. You can even create custom dashboards of your own with the particular information that you think is necessary.
v) Free of Cost: A huge plus point is that you get all these features and benefits absolutely free.
Now, Let’s See How To Add Google Analytics To WordPress.
Step 1: Signing Up for Google Analytics
The first thing you will need to do is sign up. To sign up, go to the Google Analytics website and click on the ‘Start Measuring’ button.

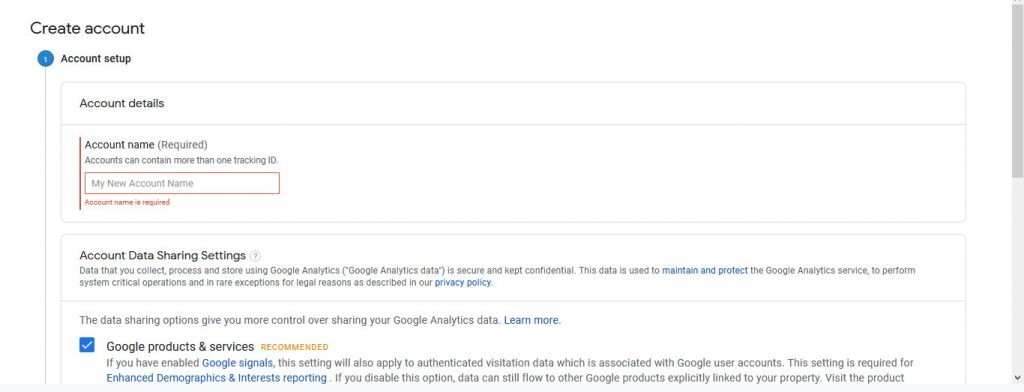
This will bring you to the account creation page. Here, you can fill in your Account Name and choose your Data Sharing Settings. If you’re unsure about the options, you can leave all boxes checked. After that, scroll down and click on Next.
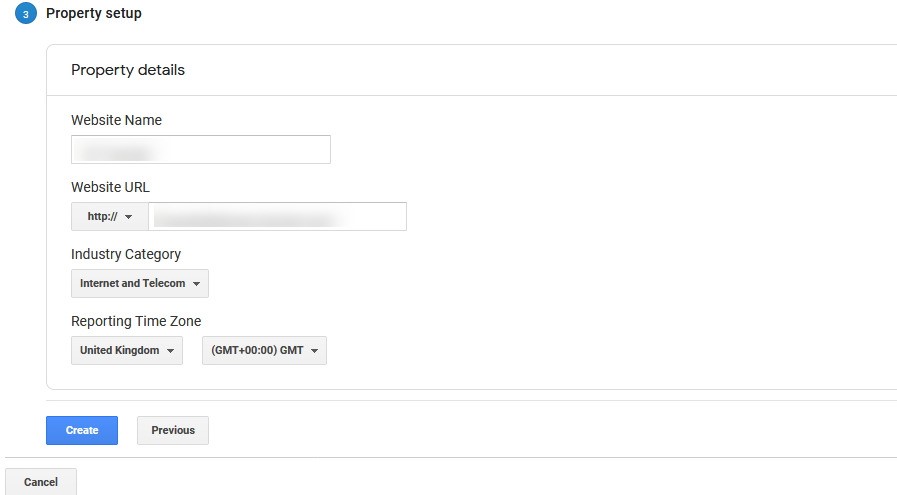
After this, you are asked to fill up the details of your website. You can add your site name and URL under the Website Name and Website URL fields respectively. Use the drop-down list under the Industry Category option to select the most suitable category for your site. After setting the Reporting Time Zones, you can go ahead and click on Create.
In the new pop-up box, accept Google’s terms and conditions and you’re ready to go.
Step 2: Connecting Google Analytics to WordPress
Now that you have signed up, we can move on to the next step. You can now connect your WordPress website to your account. You might be thinking about how to add Google Analytics tracking code to your WordPress site. There are two ways to accomplish that, each with its own merits.
In this article, we are going to show you two different methods on How to add Google Analytics.
1) Connecting Manually
To manually add Google Analytics to WordPress, you need to find your Google Analytics Tracking Code. It is easy since creating an account automatically brings you to your Tracking Code page. In case you need to navigate to it, click on the Cog icon on the bottom left and click on Tracking Info>Tracking Code. You will need to copy this code later.
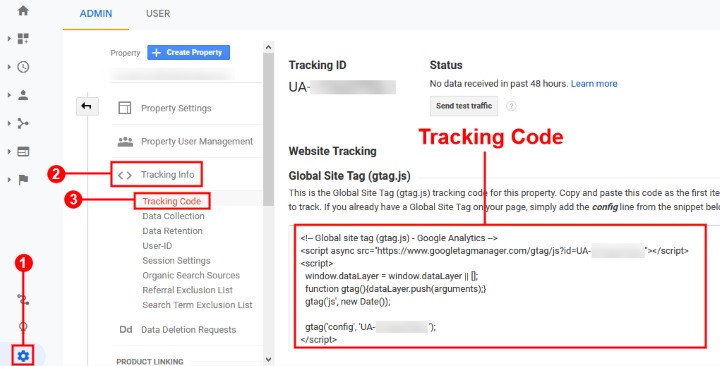
Now log in to your dashboard and navigate to Plugins>Add New and search for Insert Headers and Footers. Just Install and Activate this plugin.

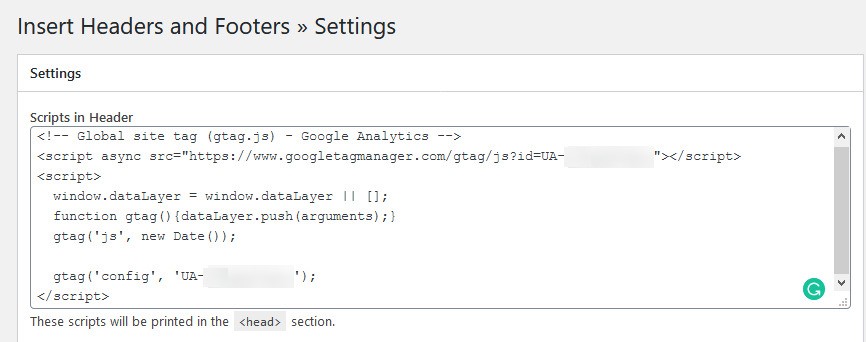
After that, you can go to Settings>Insert Headers and Footers from your dashboard. Now paste the Google Analytics Code from earlier underneath the Scripts in the Header option. Next, scroll down and click on Save and you are done.
2) Using Site Kit Plugin
If you don’t want to do with Tracking Codes, you can use the Site Kit, an official plugin from Google. You will be able to avoid the hassle of messing with codes, but it will also allow you to check out the stats right from the WordPress Themes dashboard.
From your dashboard, go to Plugins>Add New and search for Site Kit and then Install and Activate it.

Now select the new Site Kit option on your sidebar. Here, you can be started with the whole thing by clicking on Start Setup.

On this new page, click on Sign in with Google and select the google account that you used to create your Profile. If it asks for permissions, you can click on Allow.
The next page will ask you to verify your site ownership. Here, you can just click on Proceed and wait as it checks everything in the background.
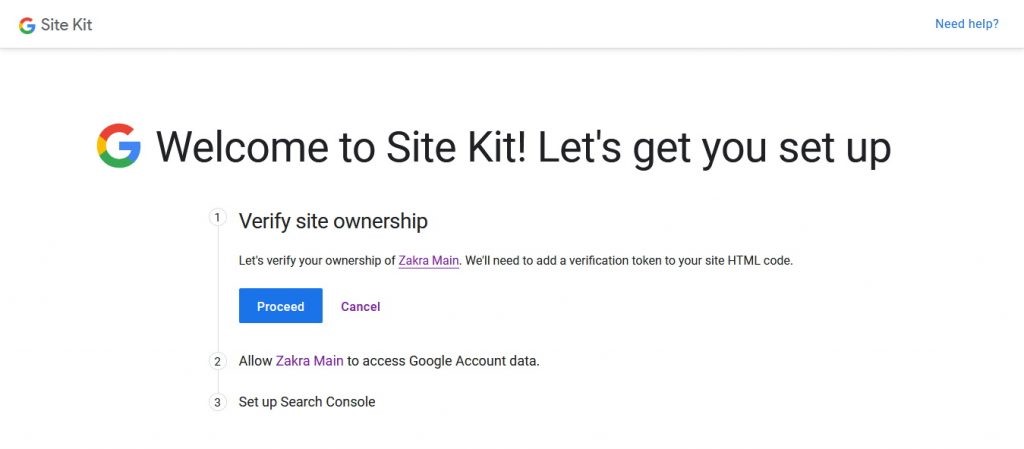
You’ll then have to repeat the previous step to give access to Google Account Data and set up the Search Console. Finally, click on Go to my Dashboard to finish it.

Once this is done, it will redirect back to your Site Kit dashboard. Now find Analytics and then click on Connect Service underneath it.

Again, select the account with Google Analytics connected and then allow it access to your data. This will bring you back to the Site Kit Dashboard so you can finish configuring.
Here, you either select your account from the dropdown list under the Account field Configure Analytics to finish the whole thing.

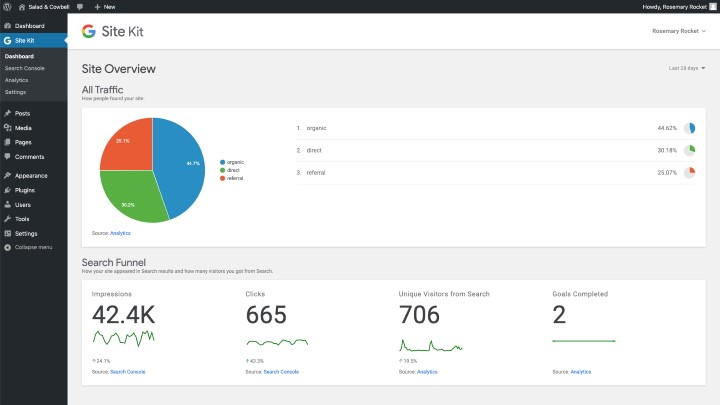
With that, you’ve configured the Site Kit and finished connecting your site. Though the process is slightly longer than the manual one, it has an important benefit. Now you will be able to check your stats right from your WordPress Dashboard.
Conclusion
Hopefully, now you are aware of how to add Google Analytics to your WordPress site. Following these steps, you can easily integrate Google Analytics into your WordPress website and track your site’s audience, behavior, and trending searches. Make sure you check out the WordPress theme bundle, which is available for $99 at a discounted price for your website and make it look professional.

